

Getting your website live should not feel like defusing a bomb. Yet for many small business owners and website administrators, the process of deploying a website via cPanel raises questions about file structures, server settings, and what happens if something breaks. cPanel is one of the most widely used hosting control panels in the world, and for good reason. It turns complex server management into a graphical interface that almost anyone can navigate. This guide walks you through every stage of the process, from file preparation through to testing, so you can launch your site with confidence.
Table of Contents
- Key takeaways
- How to deploy a website via cPanel: getting prepared
- Uploading your files: a step-by-step walkthrough
- Configuring your website environment in cPanel
- Testing and troubleshooting your deployment
- My perspective on deploying websites via cPanel
- Ready to launch? Com has your hosting sorted
- FAQ
Key takeaways
| Point | Details |
|---|---|
| Prepare files before uploading | Compress and organise your site files locally, and verify DNS settings before touching cPanel. |
| Match your server environment | Check PHP or Node.js versions in cPanel before uploading to prevent silent compatibility errors. |
| Use the right upload method | File Manager suits small sites; FTP clients handle bulk uploads; Git suits developers managing updates. |
| Secure sensitive files correctly | Store config files like .env outside public_html to block unauthorised access. |
| Test thoroughly after deployment | Check all routes, review error logs, and verify SSL is active before announcing your site is live. |
How to deploy a website via cPanel: getting prepared
Before you log in to cPanel and start dragging files around, the groundwork you do locally will determine how smoothly everything goes. Think of this stage as packing carefully before a move. If your boxes are labelled and your fragile items are protected, unpacking is easy.
What you need before you start
You need a hosting account that includes cPanel access, your website files ready on your local machine, and your domain already pointing to the correct nameservers. Checking DNS propagation first saves a lot of confusion. If your domain is still pointing at an old host, visitors will not see your new site even after a perfect upload.

Compress your website files into a ZIP archive before uploading. This is significantly faster than uploading individual files one by one, and cPanel’s File Manager can extract the archive on the server. Organise your files so that only publicly accessible content, such as your HTML, CSS, JavaScript, images, and index files, is staged for the public directory.
Choosing the right upload method
cPanel includes multiple file upload options including File Manager, Web Disk, FTP, and Git version control interfaces. Each suits a different situation, and understanding the difference before you start will save time.
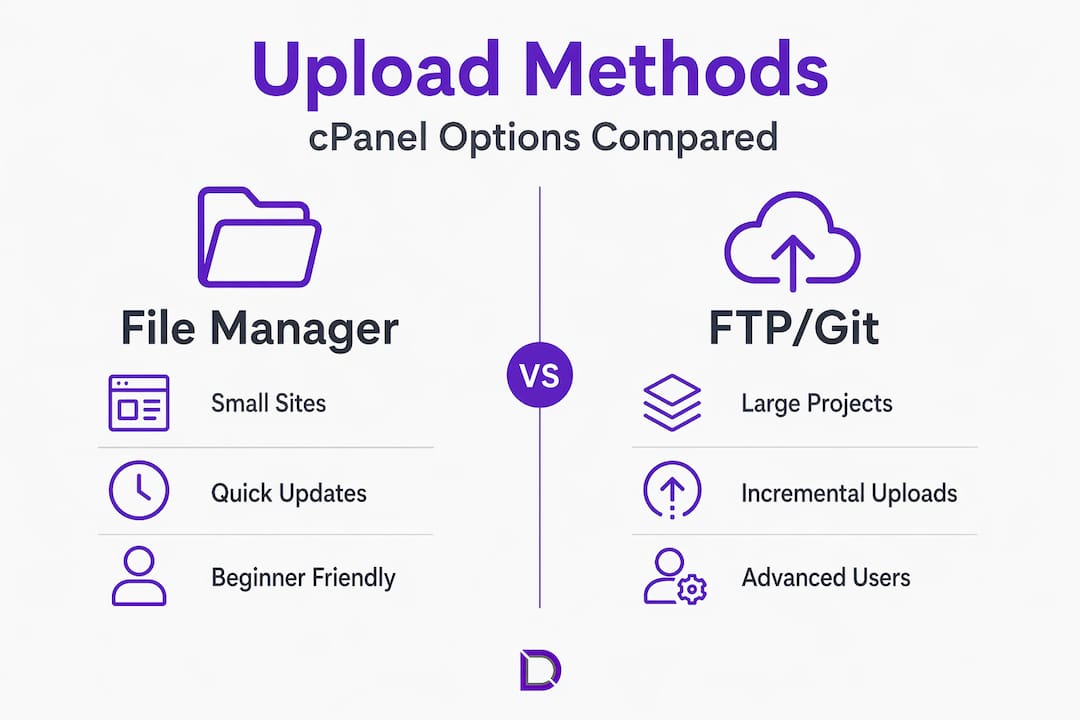
| Method | Best for | Skill level |
|---|---|---|
| File Manager | Small sites, quick updates | Beginner |
| FTP client (FileZilla, Cyberduck) | Large or bulk file uploads | Intermediate |
| Git via cPanel | Developers managing version-controlled projects | Advanced |
| Web Disk | Mounting server storage locally | Intermediate |
Pro Tip: Before uploading anything, use cPanel’s ‘Select PHP Version’ or ‘Setup Node.js App’ interface to verify server environment versions match what you are running locally. A mismatch here is one of the most common causes of deployment failures that are hard to diagnose.
Matching your local development environment to the cPanel server setup prevents silent errors. These are the errors that do not throw an obvious message but cause your site to behave strangely or fail to load entirely.
Uploading your files: a step-by-step walkthrough
With your files prepared and your environment checked, you are ready to deploy. The steps below cover the two most practical methods for small business owners: File Manager and FTP.
Using cPanel File Manager
- Log in to your cPanel account via your hosting provider’s dashboard. The URL is typically yourdomain.com.au/cpanel or provided directly by your host.
- Open File Manager from the main cPanel dashboard.
- Navigate to the public_html folder. This is the root directory your visitors see when they visit your domain.
- Click Upload in the toolbar and select your ZIP file. Wait for the upload to complete.
- Right-click the uploaded ZIP file and select Extract. Confirm the extraction destination is public_html.
- Delete the ZIP file once extraction is done to keep your directory clean.
- Visit your domain in a browser to confirm the site loads correctly.
Using an FTP client for bulk uploads
FTP clients like FileZilla offer more control, especially when uploading large projects or updating files incrementally. Connect using the FTP credentials from your cPanel account, found under the FTP Accounts section. Set the remote directory to public_html and drag your local files across.
Incremental file updates via FTP or Git reduce deployment time and lower the risk of errors compared to full re-uploads. Once you are comfortable, updating only modified files is a much faster way to manage ongoing changes.
Pro Tip: After uploading, check your file and folder permissions. Directories should typically be set to 755 and files to 644. Incorrect permissions are a common reason a site shows a blank page or a 403 Forbidden error immediately after upload.
A note for CMS users: if you are deploying a WordPress site, Softaculous in cPanel enables one-click installation which removes much of the manual process. It is worth checking whether your host includes it before uploading files manually.
Configuring your website environment in cPanel
Uploading files is only part of the picture. Your site also needs the right server environment to run correctly. This is where cPanel’s configuration tools become genuinely useful.
Setting PHP or Node.js version
Navigate to the Software section in cPanel and select either Select PHP Version or Setup Node.js App depending on your stack. Select the version that matches your local environment. This single step prevents a category of errors that often baffle beginners.
For applications that require running package managers on the server, upload only source files and build directories and then use npm or Composer via the terminal interface to install dependencies. This avoids permission conflicts and compatibility issues that arise from uploading node_modules or vendor folders directly.
Creating and configuring a database
If your site uses a database, such as a WordPress install or any custom CMS, you will need to:
- Open MySQL Databases in cPanel
- Create a new database and note the name
- Create a database user with a strong password
- Assign the user to the database with full privileges
- Update your site’s configuration file with the new database credentials
Domain settings and SSL
Check that your domain is correctly mapped to public_html under the Domains section. Then navigate to SSL/TLS and activate a free Let’s Encrypt certificate if your host offers it. A live site without HTTPS will be flagged by browsers and penalised by search engines.
Keeping sensitive files outside public_html is both a security measure and good organisational practice. Your .env files, API keys, and backend logic should never sit inside the webroot. Place them one level above public_html and reference them from your application code.
| Configuration task | cPanel tool to use |
|---|---|
| Set PHP version | Select PHP Version (Software section) |
| Set Node.js version | Setup Node.js App |
| Create database | MySQL Databases |
| Assign SSL certificate | SSL/TLS or Let’s Encrypt |
| Manage domain mapping | Domains |
| Restrict sensitive files | File Manager (move outside public_html) |
For those comfortable with Git, cPanel’s Git Version Control feature under the Files section allows you to deploy directly from a repository. This is particularly useful for developers who want a repeatable, version-controlled cPanel deployment guide for ongoing projects.
Testing and troubleshooting your deployment
A successful upload is not the finish line. Testing properly means verifying that your site works the way real visitors will experience it, not just checking that the homepage loads.
What to test after going live
- Visit your homepage from a browser you have not used before (to avoid cached versions)
- Click through every navigation link and verify there are no broken pages
- Test routes deeply after deployment to confirm proper URL rewriting, especially if you are running a single-page application. A missing or misconfigured .htaccess file will cause 404 errors on any page that is not the root.
- Verify that contact forms, login pages, and any dynamic functionality actually work
- Confirm HTTPS is active and the padlock appears in the browser bar
Using cPanel’s error logs
If something is not working, open Error Logs under the Metrics section in cPanel. These logs will often point directly to the problem, whether it is a missing file, an incorrect path, or a PHP error. Get into the habit of checking them before assuming the issue is in your code.
Keep your cPanel installation updated at all times. The CVE-2026-41940 vulnerability demonstrated that unpatched cPanel servers can be exploited to deploy backdoors without valid credentials. An up-to-date installation is your first line of defence.
Common issues to check if your site is not loading correctly:
- File paths that differ between your local machine and the server
- Missing .htaccess file or incorrect rewrite rules
- Database credentials that were not updated after migrating
- PHP version mismatch causing white screen errors
- Folder or file permissions set too restrictively
For ongoing management, understanding your hosting control panel in depth will help you diagnose and resolve issues faster as your site grows.
My perspective on deploying websites via cPanel
I have watched a lot of people tie themselves in knots over website deployment when the process really does not need to be that complicated. cPanel has its quirks, but for small business owners and first-time administrators, it remains the most forgiving and well-documented platform available.
The mistake I see most often is people skipping the environment-matching step entirely. They build a site locally on PHP 8.1, upload it to a server running 7.4, and then spend hours wondering why nothing works. It is one of those errors that does not produce an obvious message. The site just looks broken. Checking your server environment in cPanel before uploading takes about two minutes and eliminates an entire class of problems.
I also think security awareness during deployment gets far less attention than it deserves. Most beginners focus entirely on getting the site live and treat security as something to handle later. The CVE-2026-41940 vulnerability is a real reminder that unpatched control panels are active targets. Applying updates and keeping sensitive files out of the webroot should be part of your deployment checklist, not an afterthought.
My honest advice: take it in stages. Upload, test, configure, test again. cPanel’s community forums and documentation are extensive, and the platform has been around long enough that almost every error message you encounter has been solved and written up somewhere. You are not alone in this process. And if you ever feel stuck, a good local hosting provider with real human support makes the experience far less stressful than troubleshooting alone at midnight.
— James
Ready to launch? Com has your hosting sorted
Getting to grips with cPanel deployment is much smoother when your hosting environment is set up right from the start. Com offers reliable web hosting plans built for Australian small businesses, with cPanel included as standard so you can manage your site without needing a developer on speed dial.
From domain registration and management to hosting environments pre-configured for common website stacks, Com provides the local support that offshore providers simply cannot match. If you are building something more custom, the website design services team can help you get a professional result without the trial-and-error frustration. Speak to the team today and get your website live the right way.
FAQ
What does deploy website via cPanel mean?
Deploying a website via cPanel means uploading your website files to your web hosting server using cPanel’s tools, such as File Manager or FTP, so your site is publicly accessible on the internet.
Which folder should I upload my website files to in cPanel?
Upload your website files to the public_html directory in cPanel. This is the root folder that visitors access when they type your domain into a browser.
How do I fix a blank page after uploading my site to cPanel?
A blank page after upload usually indicates a PHP version mismatch or a file permissions error. Check your PHP version under Select PHP Version in cPanel, and confirm file permissions are set to 644 and folders to 755.
Is FTP or File Manager better for uploading to cPanel?
File Manager is simpler for small sites and quick updates, while FTP clients like FileZilla are better for large or bulk file uploads and ongoing incremental changes.
How do I keep my website secure after deploying via cPanel?
Store sensitive files like .env outside public_html, apply all available cPanel updates promptly, activate an SSL certificate, and monitor your error logs regularly to catch unusual activity early.
Leave a Reply