


Migrating email to a new host is the process of securely transferring all your email accounts, messages, and folder structures to a different hosting provider. The industry term for this process is email hosting migration, and it involves far more than copying files. You need to synchronise mailbox state over IMAP, update DNS records including MX, SPF, DKIM, and DMARC, and run both systems in parallel to prevent data loss. Done correctly, the result is a complete transfer with zero downtime and no missing messages. Done carelessly, it creates black holes where emails disappear during DNS propagation.
What do you need before you migrate email to a new host?
Preparation is the single biggest factor separating a clean migration from a chaotic one. Before you touch a single DNS record, complete these steps in order.
Audit your existing mailboxes. List every email account on your current host, including shared inboxes, aliases, and forwarders. Create identical accounts on the new host before any data moves. Mismatched account names are one of the most common causes of failed transfers.

Verify domain ownership. Confirm you control the domain at your registrar. You will need to update DNS records, so access to your domain management panel is non-negotiable.
Reduce your DNS TTL. Reducing DNS TTL to 300 seconds at least 24–48 hours before cutover is critical. Lower TTL means DNS resolvers refresh their cache faster, so your MX record change takes effect within minutes rather than days.
Gather authentication credentials. Most modern email providers require app passwords or OAuth tokens rather than your main account password. For manual IMAP migrations, authentication issues are commonly resolved by enabling IMAP access and generating a 16-digit app password in your account security settings.
Collect your new host’s authentication records. Before cutover, obtain the SPF include string, DKIM public key, and DMARC policy from your new provider. You will publish these into DNS during the migration window.
Choose your migration tool. IMAP-based tools like imapsync copy mailbox state folder by folder. Automated migration tools typically transfer 1–3 GB per hour per mailbox, so a 10 GB inbox can complete overnight. Manual options work for small accounts but throttle quickly at scale.
Pro Tip: Write a rollback plan before you start. Document your current MX records, TTL values, and SPF settings so you can revert within minutes if something goes wrong.
Step-by-step process to transfer email accounts and data
Email migration is state synchronisation over IMAP, not simple file copying. Every message has flags, read status, and folder placement that must be preserved. Follow these steps in sequence.
-
Create matching mailboxes on the new host. Every account from your old host needs an identical counterpart. Include shared mailboxes, role accounts like info@ and support@, and any aliases.
-
Run the initial IMAP sync. Use imapsync or an equivalent IMAP migration tool to copy all historical emails from the old host to the new one. This runs in the background while your old system stays live. Do not move emails. Copy them. Copying rather than moving emails avoids permanent data loss if the transfer fails partway through.
-
Start the parallel run. Keep both the old and new email systems active simultaneously. Your MX records still point to the old host, so incoming mail continues to arrive there. The new host is receiving copied data only at this stage.
-
Lower your MX and SPF TTL values. Drop both to 300 seconds at your domain registrar. Wait the full 24–48 hours for this change to propagate globally before proceeding.
-
Update your MX records. Point your MX records to the new host. This is the cutover moment. Incoming email will begin routing to the new server as DNS propagates.
-
Run delta syncs. Any emails that arrived at the old host after the initial sync but before DNS fully propagated need to be copied across. Run delta syncs every few hours during the propagation window to capture these messages.
-
Publish SPF, DKIM, and DMARC records. Add your new host’s SPF include string, DKIM public key, and DMARC policy to DNS. Do not skip this step. These records protect your sender reputation and prevent your outgoing mail from landing in spam.
-
Verify delivery on the new host. Send test emails to each migrated account and confirm they arrive in the correct folders. Log into each mailbox via webmail to check folder structure and message counts.
Pro Tip: Always copy rather than move data during the transfer. If your migration tool has a “move” option, disable it. You want the original data intact on the old host until you have confirmed the new host is fully operational.
The table below summarises the timing and actions across a typical 72-hour migration window.
| Phase | Timing | Action |
|---|---|---|
| Preparation | Day 1 | Audit mailboxes, lower TTL, gather auth records |
| Initial sync | Day 1–2 | Run IMAP copy of all historical email |
| Parallel run | Day 2 | Both systems active, MX still on old host |
| MX cutover | Day 2 | Update MX records to new host |
| Delta syncs | Day 2–3 | Copy emails received during propagation window |
| Verification | Day 3 | Confirm delivery, check folders, publish DKIM/DMARC |
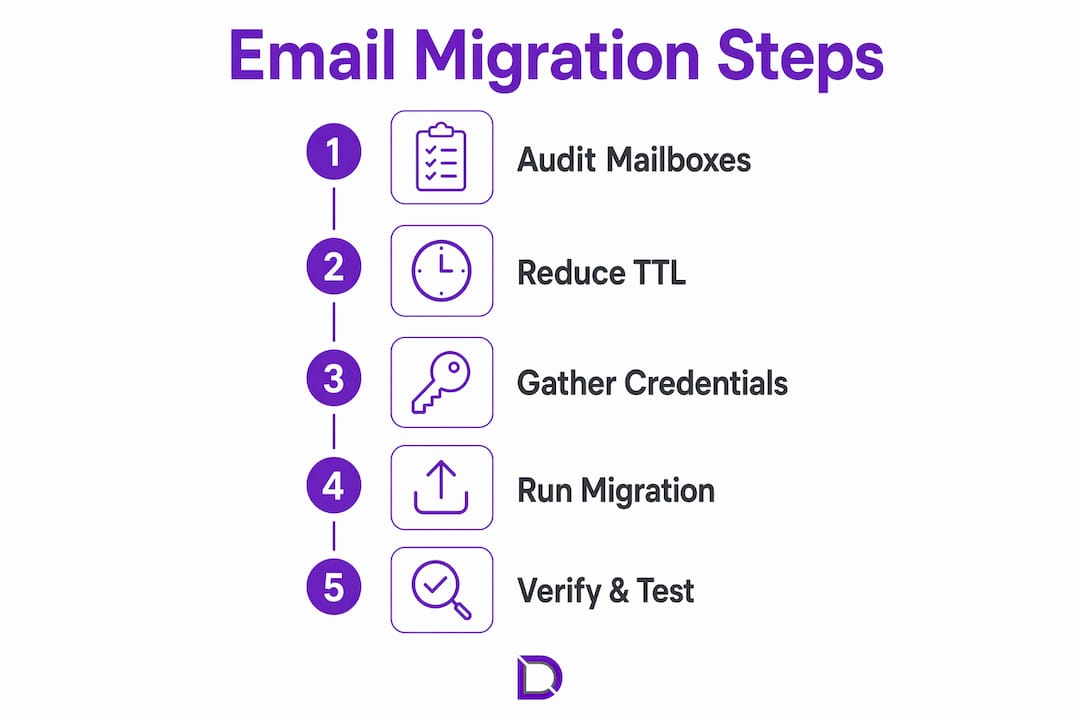
DNS propagation usually completes within 1 hour but can take up to 48 hours globally. Running both systems in parallel for 48–72 hours after the MX update prevents any messages from falling through the gap.
How do you configure DNS and email authentication records correctly?
Getting DNS right is where most migrations succeed or fail. Each record type serves a specific purpose, and publishing them in the wrong order causes delivery failures.
MX records tell the internet which mail server accepts email for your domain. When you change email hosts, the MX record must point to your new provider’s mail server. Update this record only after your initial IMAP sync is complete and your TTL has been low for at least 24 hours.
SPF records authorise specific servers to send email on behalf of your domain. Your new host will provide an include string such as include:mail.newhost.com. Add this to your existing SPF record rather than replacing it during the transition period. Once the old host is decommissioned, remove the old include string.
DKIM uses a public and private key pair. Your new host generates the private key and signs outgoing messages with it. You publish the matching public key as a TXT record in DNS. Setting up SPF, DKIM, and DMARC correctly at the new host is the difference between email that lands in the inbox and email that lands in spam.
DMARC tells receiving mail servers what to do when SPF or DKIM checks fail. Start with a policy of p=none to monitor results without blocking any mail. After two to four weeks of clean reports, tighten the policy to p=quarantine or p=reject.
Pro Tip: Use a free DNS lookup tool like MXToolbox to verify your MX, SPF, DKIM, and DMARC records after publishing. Errors in these records are invisible until mail starts bouncing.
Common mistakes to avoid:
- Publishing a DKIM record before the new host has activated the key
- Having two conflicting SPF records instead of one merged record
- Forgetting to update SPF when adding a new sending service
- Skipping DMARC entirely and losing visibility over authentication failures
Understanding how a domain registrar works helps you navigate these DNS changes with confidence, particularly if you manage multiple domains.
What are the most common problems after switching email providers?
Even well-planned migrations hit snags. Knowing what to look for speeds up recovery.
Authentication failures are the most frequent issue. Authentication failures often result from missing app passwords or wrong IMAP ports. Confirm access by logging into each migrated mailbox via webmail before configuring desktop or mobile clients. Webmail bypasses client configuration entirely, so it isolates whether the problem is the account or the client settings.
Split-brain routing happens when some DNS resolvers still point to the old host while others have updated to the new one. During this window, some senders reach the old mailbox and others reach the new one. The parallel run and delta sync process exists specifically to handle this. Ignoring DNS propagation timing and flipping MX records abruptly causes email to disappear into a black hole with no delivery failure notice.
Throttled transfer speeds affect large mailboxes on manual migrations. If you are copying a 50 GB archive, plan for multiple days of sync time based on the 1–3 GB per hour transfer rate.
Common post-migration checks:
- Verify folder structure matches the original in each migrated account
- Confirm sent items, drafts, and subfolders transferred correctly
- Test outbound email delivery and check SPF and DKIM pass in the email headers
- Set up forwarding from the old host to catch any straggler messages during propagation
Pro Tip: Send a brief note to your contacts and internal team before the cutover date. Let them know email may take a few extra minutes to arrive during the transition window. This prevents unnecessary support requests and sets clear expectations.
Maintain email forwarding from the old host for at least two weeks after cutover. This catches any messages sent to the old server by contacts whose DNS cache has not yet refreshed.
Once you are confident the new host is operating correctly and delta syncs show no new messages arriving at the old host, decommission the old accounts. Remove old SPF includes, archive any remaining messages, and close the old hosting plan.
Key takeaways
Migrating email to a new host requires a phased approach combining IMAP synchronisation, TTL reduction, parallel running, and correct DNS authentication records to achieve zero data loss.
| Point | Details |
|---|---|
| Lower TTL early | Drop DNS TTL to 300 seconds at least 24–48 hours before updating MX records. |
| Copy, never move | Always copy email data during transfer to preserve originals if the migration fails. |
| Run systems in parallel | Keep old and new hosts active for 48–72 hours after MX cutover to catch straggler messages. |
| Publish all auth records | Set SPF, DKIM, and DMARC on the new host before or immediately after MX cutover. |
| Verify via webmail first | Log into each migrated account via webmail to confirm folders and messages before reconfiguring clients. |
Why I think most email migrations go wrong at the same point
The parallel-run architecture is the most underused technique in email migration. Most people flip their MX records the moment they feel ready, then spend hours chasing missing emails that arrived during the DNS propagation window. The phased approach, where you run background IMAP syncs for days before touching a single DNS record, feels slow. It is not. It is the only method that gives you a clean safety net.
I have seen businesses lose client emails for 12 hours because they skipped the TTL reduction step. DNS caches held the old MX record long after the new one was published, and incoming mail kept hitting the old server. The fix was simple in hindsight: lower the TTL days earlier and the propagation window shrinks to under an hour.
The other mistake I see constantly is treating email migration as purely a data transfer. It is not. Email migration is an authentication overhaul as much as a data transfer. If your SPF, DKIM, and DMARC records do not align with the new infrastructure, your outgoing mail starts landing in spam within days. That reputational damage takes weeks to repair. Get the authentication records right before you send a single email from the new host.
My honest recommendation: use a managed hosting provider that handles DNS and authentication setup as part of the migration. The time saved and the risk avoided are worth far more than the cost. Check how managed hosting reduces migration risk before you attempt a large-scale transfer on your own.
— James
Email hosting migration support from Com
Changing email hosts is straightforward when you have the right support behind you. Com provides Australian businesses with web hosting plans that include DNS management, email configuration, and local technical support at every step of the process.
Com’s team understands the specific DNS and authentication requirements that make or break an email migration. Whether you are moving a single inbox or a full business email environment, Com handles the domain management and record updates so you are not left troubleshooting propagation issues at midnight. Explore Com’s hosting options and get your email running reliably on infrastructure built for Australian businesses.
FAQ
How long does an email migration take?
Migration time depends on mailbox size. Automated IMAP tools transfer 1–3 GB per hour per mailbox, so a 10 GB inbox completes overnight. Allow 48–72 hours total for DNS propagation and delta syncs.
Will I lose emails during the migration?
You will not lose emails if you run both hosts in parallel for 48–72 hours after updating MX records. Delta syncs capture any messages that arrive at the old host during the DNS propagation window.
What DNS records do I need to update when I change email hosts?
Update your MX record to point to the new host, then publish the new SPF include string, DKIM public key, and a DMARC policy. Missing any of these records causes delivery failures or spam marking.
How do I know the migration is complete?
Log into each migrated mailbox via webmail and confirm folder structure and message counts match the original. Send a test email and verify SPF and DKIM pass in the message headers.
When should I decommission the old email accounts?
Decommission old accounts after at least two weeks of clean operation on the new host. Maintain forwarding from the old host during this period to catch any straggler messages from contacts with stale DNS caches.
Leave a Reply